There are several methods in which you can accomplish your deployment goals. The way you deploy O365 is entirely based on your network environment. This document provides methods with which you may want to deploy the Office 365 Suite to your end users.
Of course, with O365, you always have the option to download the installer directly from Microsoft’s CDN and install it manually on each workstation. Though this is an option, it can be both time-consuming and cumbersome. For the sake of documentation, we do list it as a method.
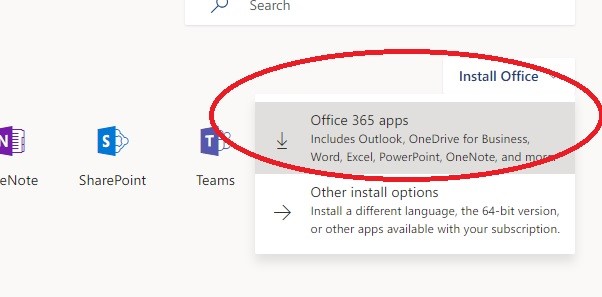
To do so, simply go to office.com, sign in, then download the installer to the local workstation.
Once installed, you can log in to the Office Suite with your PennO365 account and this will authorize your software license.

The second method you can use to deploy O365 is to install on your organization’s standard workstation image.
Windows 10
The process to install an inactivated version of Office 365 ProPlus for deployment is as follows:
1. Create your base image.
2. Install Office 365 ProPlus on your image via the Office Deployment Tool (ODT) as documented by Microsoft: IMAGE DEPLOYMENT VIA ODT. The key to keeping the installation inactive is by adding this important line to your configuration XML file: <Display Level="None" AcceptEULA="True" />
3. Check that no O365 product key is installed on your image via command prompt:
- cscript.exe "%programfiles%\Microsoft Office\Office16\ospp.vbs" /dstatus
- You should see <No installed product keys detected> in your prompt.
4. Deploy your image as defined by your organization’s deployment standards.
MAC OSX
The process as recommended by Microsoft for deployment to MAC OSX operating systems is to download the latest package from the Microsoft CDN and deploy using your organization’s deployment process.
This can be by providing your end users with instructions to install, assigning a technician to install on individual workstations or to use whatever software distribution tools you have at your disposal.
For more information, see this related Microsoft article.
For automated deployment of O365 Pro Plus to your environment, Microsoft has created the Office Deployment Tool. This tool allows you to install the latest version of Office 365 Pro Plus across your network via a command prompt executable. To download the tool, visit the Microsoft Download Center.
**IMPORTANT NOTE** This tool requires that you have local administrator permissions on the client computer.
This tool allows installation of Microsoft Office on local machines by automating the download, installation, and various other parameters of deployment.
The tool itself is comprised of two elements:
- The setup executable
- The configuration XML file
When executed properly, the setup executable references all parameters as defined in the configuration XML file and carries out the installation.
Installation Parameters via XML File
There are several parameters you can specify via the configuration XML file, these are the most frequently used:
- Products within the suite: You can also include Visio and Project if you plan to deploy those apps.
- Update channel: Semiannual or monthly
- Language: choose the language for your installation
- Operating system: choose the operating system Office will be installed on
- Installation Source: choose the location from which your installation media will be derived
- Update Method: If you’d like to automatically run updates during install
- Upgrades: allows you to remove legacy installs of the Microsoft Office Suite.
- Additional properties: To silently install Office for your users, choose Off for the Display level and On for the Automatically accept the EULA.
- Application preferences: Define any Office settings you want to enable, including VBA macro notifications, default file locations, and default file formats
Of course, you can choose to write your XML file from scratch via the instructions here: Configuration XML.
Luckily, Microsoft also provides a web-based tool to create/export this file via the Office Customization Tool: https://config.office.com/
For additional information regarding the Office Deployment Tool, please see the related Microsoft article: Microsoft Office Deployment Tool
-
Shared computer – numerous windows profile
- Using the Office Deployment Tool (ODT)
There is a way to deploy Office 365 on a device without automatically activating a user license based on the first person to log in. This is referenced in Method 2 – computer imaging above. This method requires each user to log in with their respective O365 accounts when using the shared workstation.
- Using Office Online
If an end user has a PennO365 account, they can use the Office Online web interface by opening a web browser, going to www.office.com, and logging in with their account credentials.
-
Shared computer – single windows profile
- Using a Shared PennO365 Resource Account
As an organization, you can opt to create a non-PennKey Penno365 account used for a specific workstation to authenticate for licensing Office 365. This does have a cost associated with it but is certainly an option for this scenario.
- Using Microsoft Volume Licensing
Using Microsoft Volume Licensing to install a perpetual version of Office 2019 is an option. This can be particularly useful when sharing a workstation with end users that don’t have PennO365 accounts.
***Keep in mind, this is not the most recommended solution as the perpetual install of Office 2019 does not receive the Feature Updates provided by the Office 365 click-to-run install options. What this means is that once the office is updated to the next version, this will require you to purchase/upgrade to the newest version again.***