Overview
Microsoft Teams is a collaboration tool designed to consolidate numerous aspects of teamwork by providing a centralized portal for communication methods such as instant messaging, team meetings, video conferencing, and file sharing.
Microsoft Teams has integrations to various platforms within the PennO365 environment such as calendars, contacts, OneDrive storage, SharePoint sites, OneNote, and many other Microsoft O365 applications.
Microsoft Teams in PennO365
Microsoft Teams is available to anyone who uses the PennO365 service.
Users who don’t use PennO365 can still be part of a team but must be added as a Guest account. For more information regarding guest account access, please see this related article: https://docs.microsoft.com/en-us/microsoftteams/guest-access
Policies
Team Names
To reduce the amount of confusion/duplication in Teams namespace, ISC is enforcing a policy to prefix every Team name with the ORG abbreviation the creator resides in.
For example: If an ISC member wants to create a Team for “Project A” the Team name will automatically be named “ISC-Project A”. Note: If you'd like to create a Team name without the automated prefix, please submit a help ticket to ISC Client Care
ISC also reserves the right to disable any Team with a name that is deemed offensive by the Penn Community, is used for harassment or threats, or adversely impacts the business operations of the University. An audit log of all created Teams and creators is recorded by the service.
Microsoft Teams is available for installation on a variety of devices including Microsoft Windows, Apple Mac OSX, Android devices, and iOS devices.
Please see the links below to install on your device:


Each Microsoft Team Channel has a series of tabs along the top of the window. These are Features that can be used or added to a Teams Channel to assist with productivity.
Features
- Conversations
- Chats: Chats are used for one-on-one chats or for impromptu small group discussions. These are not tied to any Microsoft Team. Group chats can also be renamed to the topic which can delineate the group chats from each other. Any data sharing in this scenario is stored on the OneDrive of the chat initiator under “Microsoft Teams Chat Files”.
- Channels: Channels are dedicated communications areas under an organized Microsoft Team. They can be used to organize or steer communications regarding specific topics. Each Teams channel can have up to 250 members. To understand the differences between Teams and Channels, please see this related article: Teams and Channels.
- Notifications: There are a variety of ways you can set Microsoft Teams to notify you both in the Desktop Client and well as your mobile device. For a full breakdown of these settings, please see this related article: Microsoft Teams Notifications.
- Files
- Teams Files: The Files tab under a Microsoft Teams Channel is a dedicated storage repository regarding that specific topic in your Team. It uses Microsoft SharePoint to store and manage permissions of these files. For more information about Teams Files storage, please see this link: Collaborate on files with your Team.
- Personal Files: You can also store personal files directly in Microsoft Teams and ties directly to your OneDrive account in PennO365.
- Storage Limits: The storage limits in Microsoft Teams are based entirely off of PennO365 license types and the storage limits for OneDrive and SharePoint, respectively. For OneDrive, each user is allocated 1 terabyte of storage and each SharePoint site is allocated 25 terabytes of storage. It is important to note, each Team gets 25 terabytes, not each Channel. For more information regarding Microsoft Teams Limits, please see this related article: Limits and specifications for Microsoft Teams.
- Staff Notebook – OneNote
- If you’re familiar with OneNote, that’s exactly what the Staff Notebook is. The idea behind this tab in Teams is to keep a virtual notebook that all members of a Team have access to and can contribute to and/or view in real time. For more information about Microsoft OneNote, please see this related article: Microsoft OneNote.
- If you’re familiar with OneNote, that’s exactly what the Staff Notebook is. The idea behind this tab in Teams is to keep a virtual notebook that all members of a Team have access to and can contribute to and/or view in real time. For more information about Microsoft OneNote, please see this related article: Microsoft OneNote.
- Adding additional Apps to a Teams Channel tab
- Microsoft Apps – Microsoft has developed several apps that can be added to a Team channel to assist with productivity. There are project management apps like Microsoft Planner, as well as survey/polling tools like Microsoft Forms. For more information regarding the various apps Microsoft has for teams, please see this related article: Overview of apps in Teams.
- Websites – If your team uses a web-hosted application, you can access it directly within a Microsoft Teams tab! For instructions on setting this up, check out this related article: Websites as tabs for Microsoft Teams.
- Third Party Teams Apps
- There are some apps available from third party software vendors that are not enabled by default. If there is an app that your team would like to use it can be requested to ISC as an IT ticket by emailing help@isc.upenn.edu or at https://supportcenter.upenn.edu. The app is vetted through the Office of Information Security prior to being enabled.
Microsoft Teams can be used to schedule, manage, and participate in meetings and conference calls. It directly integrates with PennO365 user calendars and provides its own platform to have online meetings and video conferences. Meetings can also be managed in Microsoft Outlook via the Microsoft Teams add-in. Meetings can have up to 1,000 invites since view-only is not enabled in the PennO365 tenant. For more information on the Microsoft Teams add-in for Outlook, see the following article: Using Microsoft Teams for Outlook.
For more information regarding managing your meetings with Microsoft Teams, please see the following website for a How-To video and instructions: Microsoft Teams Meetings.
Microsoft Teams Live Events are an extension of Teams meetings that enable you to schedule and produce events that stream to large online audiences. Live Events broadcast a one-way stream of audio, video, and meeting content to up to 10,000 attendees. Standard Microsoft Teams meetings are limited to 1,000 meeting invites, so Live Events are recommended for meetings with a larger audience.
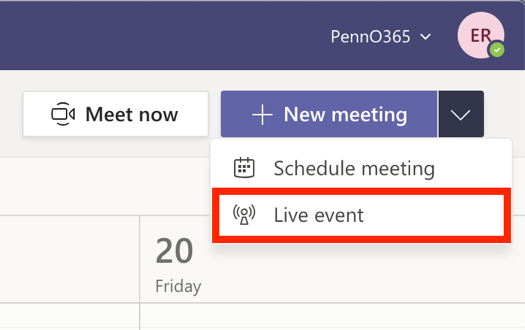
- Open Microsoft Teams and select Calendar in the left sidebar.
- Click the down arrow next to the New Meeting button, located in the upper right corner of the Teams window, and select Live Event.
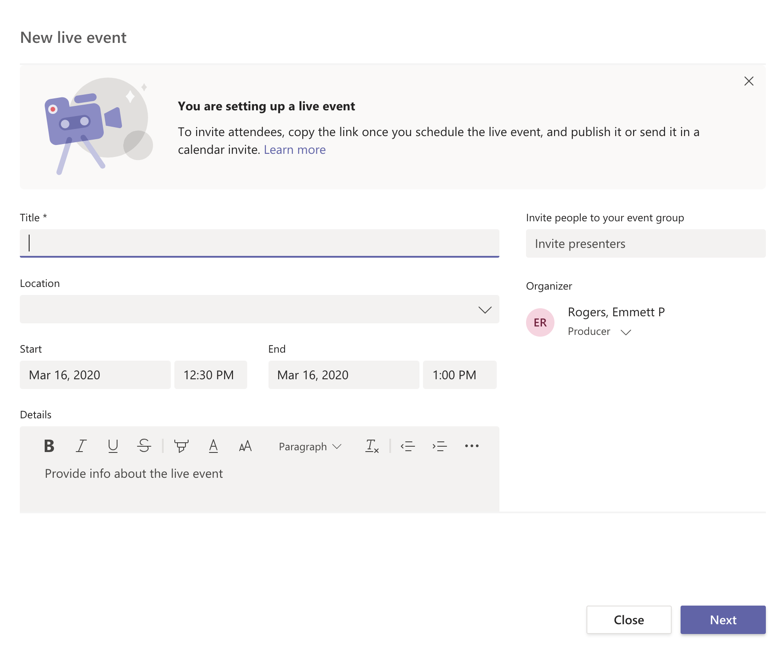
- In the following window:
- Add the meeting required Live Event details: Title, Start Date/Time, End Date/Time.
- In the Invite people to your event group box, add the names of the people who will be presenting and producing the event and choose the appropriate permission for each.
- Producer – A Producer can control the live event stream, including starting and stopping the live event, sharing their own video, sharing a participant’s video, sharing their active desktop or window, and selecting layouts.
- Presenter – A Present can share audio, video, or a screen to the live event, and moderate Q&A.
- Click Next.
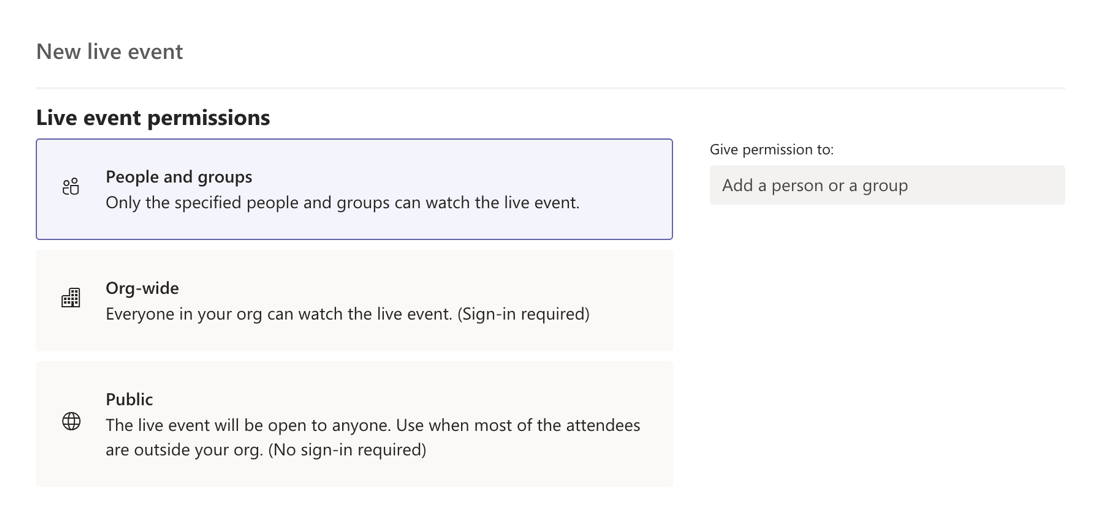
- In the following window, under Live event permissions, choose who can attend your live event. For reference, an Attendee or Viewer, watches the event and can participate in Q&A. Once a permission level is chosen, be sure to scroll down for additional settings and move on to the next step for instructions.
- People and Groups – The event can only be watched by people, contact groups, or Office 365 groups you name.
- Org-Wide – Everyone in your org can watch the live event, including guests. NOTE: Org-wide includes everyone in the PennO365 tenant.
- Public – Anyone can join – both people in your org and those outside of it. NOTE: Public is the recommended setting because it will make joining the event for Attendees the easiest since they will not have to authenticate with their PennO365 credentials. Please be sure that all Producers and Presenters are aware of this setting.
- Below, under How do you plan to produce your event?, confirm that the radio button next to Teams is checked. Select any additional settings that you would like to enable for your event, including Recording, Captions, and Q&A. NOTE: Q&A is disabled by default, so be sure to enable it if you would like to use it in your Live Event.
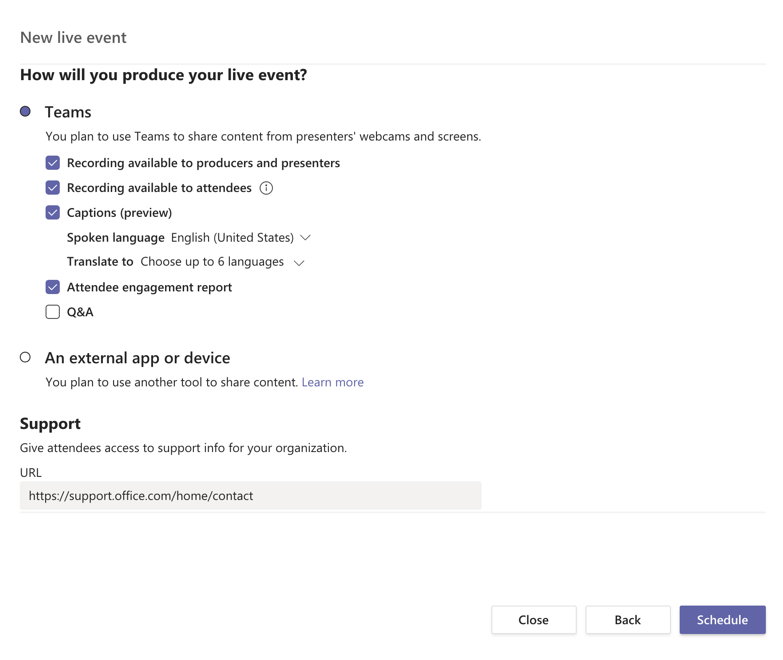
- Click Schedule to complete the setup of your Microsoft Teams Live Event.
When you schedule a Live Event in Teams, it only sends the calendar invite to Producers and Presenters. Once the event is scheduled, follow these instructions to share the event link with Attendees.
- Open Microsoft Teams and select Calendar in the left sidebar.
- Select the Live Event that you just scheduled in your calendar.
- Select Get Link to copy the Live Event link.
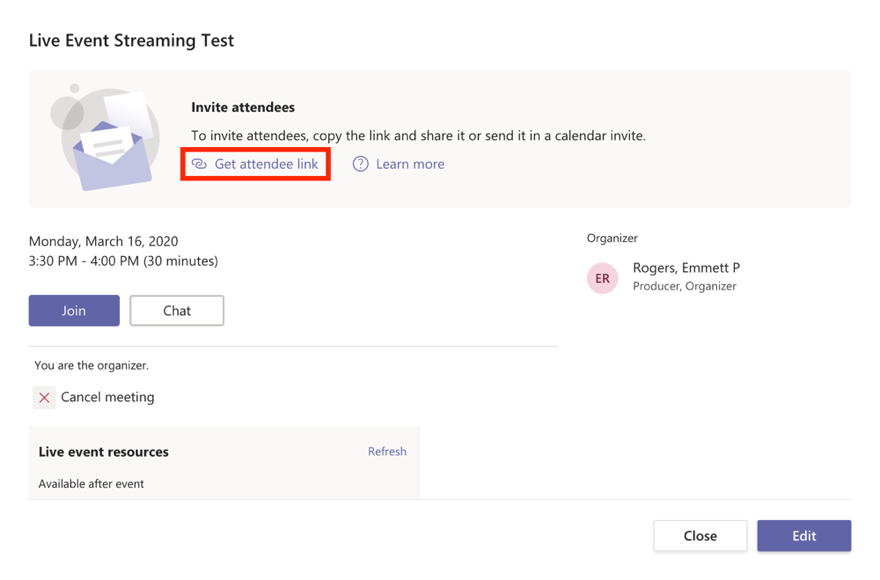
- Share this link with Attendees as you see fit. We recommend creating an Outlook calendar invitation for the event, inviting all attendees, and pasting the event link in the body of the invitation.
- Open Microsoft Teams and select Calendar in the left sidebar.
- Select the Live Event in your calendar and click Join. NOTE: The Live Event will not start until one of the event Producers clicks the Start button to the right of the screen after joining. Until that time, Attendees will only see the message “The live event has not yet started”.
- The following is a screenshot of the meeting controls available when you join the meeting. The lettered bullets beneath the screenshot provide a description of each tool:

A. Broadcast Content – At the bottom of the window is the list of content that can be broadcast to the Live Event Attendees. In this list you will see any Presenters that have joined the meeting and content that has been shared to the meeting. Click on any of the items in this list to send it to the Preview Window. Also, you can click the Microphone and Camera icons on each Presenter to disable their Microphone and Camera.
B. Share – Choose content on your computer to display in the broadcast. Share options include your entire Desktop or a specific application Window open on your computer such as PowerPoint.
C. Preview Feed – Window that displays the selected content that is ready to be sent to the Live Feed and broadcast to the Live Event Attendees.
D. Display Layout – Layout options for the content in the broadcast. The button on the left displays a single window with the selected content displayed Fullscreen. The button on the right displays picture-in-picture, with content in the large window to the left while the presenter’s camera is displayed in the small window to the right.
E. Send Live – Click this button to send whatever is displayed in the Preview Window to the Live Feed and broadcast it to the Live Event Attendees.
F. Live Feed – Windows that displays the content that is currently being broadcast live to the Live Event Attendees.
G. Meeting Information – In the top-left of the meeting window is relevant information about the meeting, including the Status (Pre-Live, Live, or Ended), Duration, Recording, and Number of Attendees.
H. Additional Meeting Controls
- Leave – Click Leave to leave the Live Event but allow it to keep running with other Presenters.
- Q&A – If enabled, allows Attendees to interact with the Live Event presenters.
- Meeting Notes – Notes shared between the Presenters in the Live Event. These are also available to the Presenters after the event is over.
- Meeting Chat – A chat among the Presenters in the Live Event. The chat history is also available to the Presenters after the event is over.
- People – View other Presenters in the Live or add another Presenter to the meeting that isn’t already present.
- Settings – Configure your device settings, like Speaker, Microphone, and Camera.
I. Start/End – Click the Start button to start the Live Event. NOTE: There is a 15 – 60 second delay from the time a media stream is broadcast to when attendees see it.
4. When you are finished, click the End button to end the Live Event.
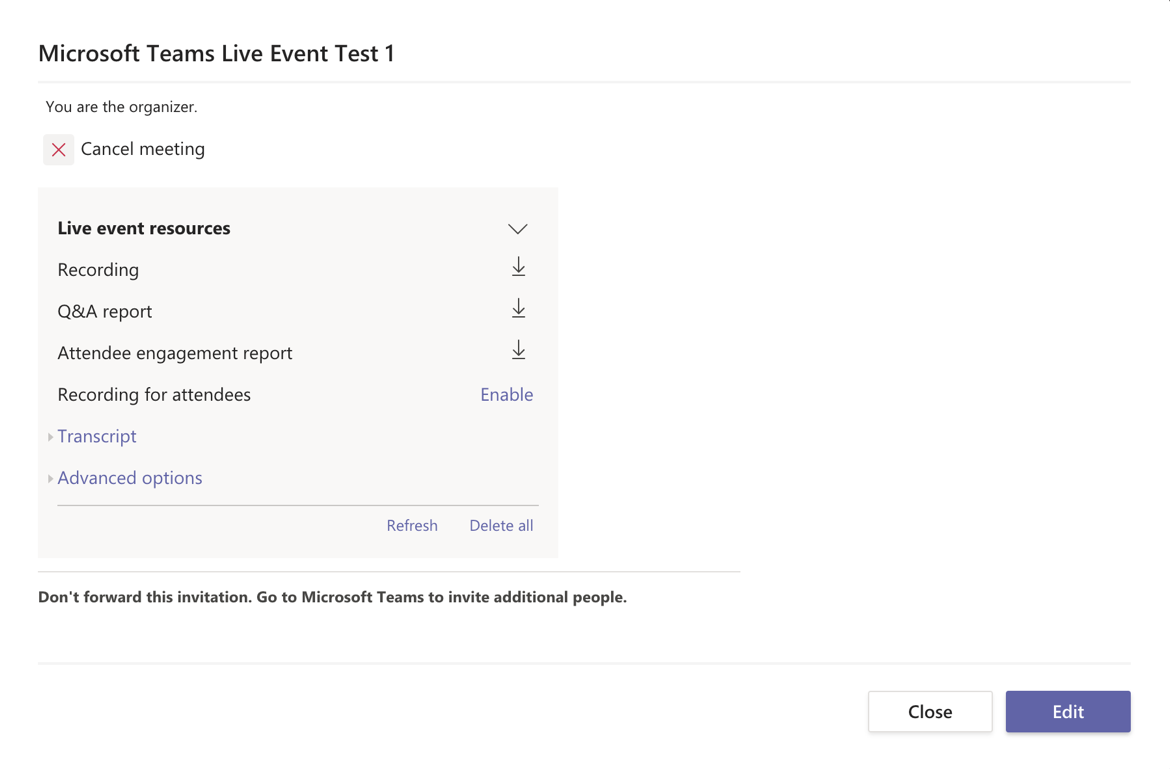
After a Teams Live Event is completed, any associated recordings and reports can be accessed by the Presenters of the event. To manage Teams Live Event recordings and reports:
- Open Microsoft Teams and select Calendar in the left sidebar.
- Select the Live Event in your calendar.
- Scroll down in the Live Event information and you will see the listing of available resources.
- Click the Down Arrow next to any of the items to download. Click Delete All under the list to delete all of the resources.
NOTE: If you enabled Recording Available to Attendees in the Live Event setup, Attendees can access the recording using the original Live Event link.
The following page provides information on the experience of attending a Teams Live Event: Attend a Live Event in Teams. We recommend that you share this link in your event invite to assist Attendees with joining the event.
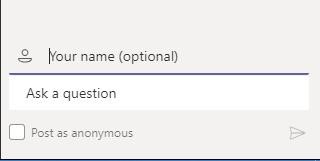
One thing to note, if Q&A is enabled, Attendees can either submit questions anonymously or enter their name. If entering their name, enter it into the Your name (optional) field. Otherwise, they can click the Post as anonymous button to remain anonymous. They then enter their question in the Ask a question field. An image of this field can be seen below:
For more information on Teams Live Events, please see the following website for Microsoft's guide: Get Started with Microsoft Teams Live Events
Microsoft has designed their own training website complete with quick start guides, training videos, and complete overviews to the entire product suite.
Click the following link to get there: End User Training for Microsoft Teams.
Resources
ISC’s support of Microsoft Teams is limited to issues that may be caused by a problem within the PennO365 environment. ISC will provide general usage guidance and assistance to IT support staff in schools and centers on a “best effort” basis.
End users in schools and centers should contact the IT support group within their organization for assistance. A list of support contacts is available here.
Any member of the PennO365 tenant is eligible.
You should contact your Local IT Support Provider (LSP) for assistance with Microsoft Teams. To find out who your LSP is, please see this website: https://www.isc.upenn.edu/facultystaff-support-directory
Microsoft Teams are the top-level organizational structure for being a member of a specific Team. Within that Team, you can find dedicated channels for specific sub-topics within that Team. For more information regarding Teams vs Channels, see this related article: Microsoft Teams and Channels.
Yes, but if they are not a member of the PennO365 tenant, or are not licensed for Microsoft Teams, they will be added as a Guest. For more information regarding guest account access, please see this related article: https://docs.microsoft.com/en-us/microsoftteams/guest-access
You can place an audio call to another team member via the app, but it does not use traditional phone service to place the call.
Microsoft maintains its own article regarding upgrading from Skype for Business to Microsoft Teams https://docs.microsoft.com/en-us/microsoftteams/faq-journey
For additional Microsoft Teams training, please see Microsoft’s dedicated training website: https://docs.microsoft.com/en-us/microsoftteams/enduser-training
Yes, by default this is turned on and is user-controlled. You can disable this by clicking your icon in the top-right hand corner of Teams, going to the Settings area, and going to the Privacy section and toggling the Read receipts button off.